Showing posts with label Betsy Davis. Show all posts

Sunday, October 11, 2015

Blondies (Gluten Free) from Betsy Davis

For those watching their gluten intake, these blondies are so yummmmmmy! Thanks to Betsy Davis for bringing them to the October Historical League meeting.

For this recipe you have to make an all-purpose gluten-free flour blend, the recipe follows with my notes in parenthesis:

ALL-PURPOSE GLUTEN-FREE FLOUR BLEND - Recipe from the How Can It Be Gluten Free Cookbook, Volume 2
4 1/2 c plus 1/3 c white rice flour (I made rice flour by buying the rice and grinding it in my Nutrabullet with the grain blade)

1 c brown rice flour

1 c potato starch (Bob's Red Mill brand is available at Sprouts)

3/4 c tapioca starch (Bob's Red Mill brand is available at Sprouts)

3 Tbs nonfat milk powder
Makes about 9 cups gluten-free all-purpose flour.  Transfer to an airtight container and refrigerate for up to 3 months or freeze for up to 6 months.  Bring to room temperature before using; if you don't bring the flour to room temperature before using, the recipe may not work as expected).

BLONDIE RECIPE
Ingredients:
1 3/4 c All-Purpose gluten-free flour

3/4 tsp salt

1/2 tsp baking powder

1/2 tsp xanthan gum  (Bob's Red Mill brand is available at Sprouts - this is what makes the blondies hold together)

7 Tbsp unsalted butter, melted and cooled

1 c packed brown sugar, light or dark

1/2 c granulated sugar

2 large eggs

2 Tbsp milk

4 tsp vanilla extract

1/2 c white chocolate chips

1/2 c semisweet chocolate chips
Directions:
1) Adjust the oven rack to the middle position and heat oven to 325 F.
2) Make a foil sling for an 8-inch sure baking pan by folding 2 long sheets of aluminum foil so each is 8 inches wide.  Lay the sheets of foil in the pan perpendicular to each other with extra foil handing over the edges.  Push the foil into the corners and up the dies of the pan, smoothing the girl flush to the pan; spray with vegetable spray.
3) Whisk the flour blend, salt, balking powder and xanthan gum together in a bowl.
4) In a large bowl, whisk the melted butter, brown sugar and granulated sugar together until no lumps remain. Whisk in the eggs, milk and vanilla until very smooth.
5) Stir in the flour mixture with a rubber spatula until the flour is completely incorporated and the batter is homogeneous, about 1 minute.
6) Fold in the white and semi-sweet chocolate chips. (All of my chips sank to the bottom of the batter when they cooked.  The next time I make this I will scrape the batter into the pan and sprinkle the chips on the top and see how that does.)
7) Scrape the batter into the prepared pan and smooth the top with a spatula.
8) Bake until blondies are a deep golden brown and a toothpick inserted i the center comes out clean, 50 to 60 minutes, rotating the pan halfway through baking.
9) Let the blondies cool completely in the pan, about 2 hours.  Using the foil slip, remove the blondies from the pan.  Cut into desired size squares and serve.
Blondies can be stored in an airtight container at room temperature for up to 2 days.


Wednesday, April 8, 2015

More Spring Party Pictures

Ben Davis, Kay Holcombe, Ruth McLeod,
Betsy Davis and Leslie Christiansen enjoy marshmallows
Deb Hester, Jack and Renee Donnelly

Ben Davis, Patt and Chris Walker, Betsy Davis,
Ruth McLeod and Sharron McKinney


Bartenders Al McLeod and Roger Swanson enjoying their jobs
1929 Estate at Phoenix Country Club


Sunday, April 5, 2015

Spring Party a Big Success

Thanks to Betsy Davis and Leslie Christiansen who did a tremendous job organizing the Spring Party at this remarkable home at Phoenix Country Club. (Thanks to Anne Lupica for making the 1929 home available to the Historical League). It was a fun and fascinating evening for all who attended. Private tours of the home were a highlight as well as the fabulous food.

Betsy Davis and Leslie Christiansen share a laughter-filled moment.
Spring Party location - 1929 Estate
Larry Baker enjoys Leslie's Chocolate Tower and all
the desserts she made for dipping.

Leslie made 3 different kinds of homemade marshmallows for the Chocolate Tower!

Friday, February 13, 2015

Betsy Davis reinvents Low Calorie Toffee Coffee Cookies

Betsy Davis made a yummy cookie for the February Historical League meeting.

Her comments, "I'm so happy that everyone liked the cookies.  It was a new recipe for me - I got bored one day and googled "low calorie cookies" and this is one of the recipes that popped up.  I actually modified it a little bit and I think they turned out pretty well!"

Toffee Coffee Cookies

Yield: 36 cookies
Serving Size: 1 cookie
Calories per cookie: 78, 9.7 grams of sugar per cookie

The coffee flavor pairs well with the sweetness of the toffee.  These cookies are really soft and will stay that way for a week if stored in an airtight container.

Ingredients:
2 c. all-purpose flour
1 1/2 tsp baking powder
1 1/2 tsp cornstarch
1/4 tsp salt
5 Tbs butter
2 Tbs instant coffee (I imagine you could use instant espresso too if you wanted a stronger coffee flavor)
2 egg whites
1 Tbs vanilla extract
1 c. brown sugar, light or dark.  I used dark as I prefer the stronger molasses flavor.
4 Skor bars, broken up into small bits in the food processor, or chopped very small with a knife

Directions:
1. In a medium bowl, whisk together the flour, baking powder, cornstarch and salt.

2. Melt the butter in the microwave or on the stove. Pour into a medium sized bowl.

3. While the butter is still hot, add in the instant coffee and stir vigorously until almost all of the coffee dissolves.  It's important to mix the coffee into hot butter because it dissolves better and this reduces the amount of coffee speckles in the cookies and distributes the coffee flavor better.

4. Mix the egg whites and vanilla into the butter coffee mixture.  Then add the brown sugar, smearing out any clumps on the side of the bowl.

5. Combine the two bowls of and stir until incorporated.  I used my electric mixer on a medium setting.

6. Mix in 6 Tbs of the crushed up Skor bars.

7. Cover the bowl with plastic wrap and chill for a couple hours.  Or, throw it in the freezer for 20 minutes.  You can refrigerate it overnight if you want to make the batter one day and bake the cookies on the next.

8. Preheat the oven to 350° and line to baking sheets with parchment paper or spray them with cooking spray.

9. Using a Tablespoon measure, scoop out flat tablespoons of dough and make them into balls and place onto the prepared cookie sheet.  Spray the back of a spoon with non-stick spray and use it to flatten the cookies.  The, spoon a little bit of the leftover crushed Skor bars into the center of each cookie and press the topping into the cookie so it will stick there.  Eat any leftover bits of Skor bar ;)

10. Bake at 350° for 9 - 11 minutes.  I baked mine for 9 minutes.  They will look and feel slightly underdone.  Take the cookies out of the oven and let them cool on the baking sheet; they will finish cooking there.


Lots of great dessert recipes in Tastes & Treasures cookbook also.

Friday, November 14, 2014

Mini Cheese Cakes served at Membership Open House

Betsy Davis serving Cheese Cake Bites
Outstanding dessert and beautiful presentation, these are a special treat for company and family. If doubling the recipe, make it one batch at a time.
A recipe for cheesecake can be found on page 170 in Tastes & Treasures cookbook.

Lemon-Blueberry Cheesecake Bites
T= Tablespoon
t= teaspoon

Ingredients:
Crust:  
2 T sugar
½ stick butter, soft
¼ t ground cinnamon
9 graham crackers

Filling:
16 oz cream cheese, at room temperature
2 large eggs, at room temperature
2 lemons, the zest and juice (not Meyer lemons)
½ cup sugar
1 pint fresh blueberries
1 cup Heavy Whipping Cream, to dollop on top

Directions Crust:
Preheat oven to 325 F.  Line two 24 count mini cupcake pans with foil cupcake liners and spray the inside with non-stick cooking spray. 
In the bowl of a food processor place the graham crackers, (broken up a bit) sugar, butter and cinnamon.  Pulse until combined and the mixture is the texture of sand.  Transfer the first recipe to a bowl and make the next batch of crust.  Then proceed below. 
Use a Tablespoon to measure and fill the prepared crust into each mini liner, pressing the mixture down with a small bottle; a Tabasco bottle is the perfect size, or you can use your fingers, too. 
Bake for about 10 minutes until golden brown. Remove crust from the oven and set on a wire rack to cool.  Make the second batch.

Directions Cheesecake Filling:
Place cream cheese, eggs, lemon juice, lemon zest and sugar in the same food processor.
Process about 30 seconds to combine. Scrape down the inside of the bowl once with a small spatula and then pulse the ingredients again until smooth.  Scrape down the inside of the food processor again.
Use a small ice cream scoop to measure the batter into the cooled crust.  Fill each cupcake liner almost full, about ¼- inch from the top.  Smooth the top with a small offset spatula, spoon or butter knife. 
Bake for 15 minutes or until the center only slightly jiggles; do not over bake!
Remove from oven and allow the cheesecake to cool in the pan for about 10 minutes before transferring to a wire rack to cool completely. 
Fill the second batch of prepared cheesecake crusts when they are in the cupcake tins; baking just like the first batch, for about 15 minutes.  Allow them to cool in the tin for about 10 minutes before transferring to a wire rack; allow to cool completely.
Transfer the cheesecakes to a container; cover; chill for at least 6 hours; even better if they can set up overnight. 
Just before serving, remove the paper from the cheesecake and top with a dollop of fresh sweetened whipped cream and place 1-3 blueberries on top. 

Makes about 48
Thanks to Chef Leslie Christiansen for recipe and detailed helpful hints.

Note: One small 6 oz container of blueberries has about 120 plus berries in it.

Friday, May 16, 2014

Harvey Girls at Recognition Luncheon

Wanted - young women 18-30 years of age, of good moral character, attactive and intelligent, to waitress in Harvey Eating Houses on the Santa Fe rail line in the West. Wages, $17.50 per month, with room and board. Liberal tips customary. Experience not necessary. Write Fred Harvey, Union Depot, Kansas City, Missouri. This was the ad in 1870 in several East Coast newspapers. And the women came in droves!

Learning about the Fred Harvey and the Harvey Girls was a highlight at the Historical League Spring Luncheon. Guest speaker Ann-Mary Ludzick filled us in on the details and 6 "Harvey Girls" came from Winslow to show the beautiful china used at Harvey Houses. Thanks to Betsy Davis and Leslie Christiansen for organizing such a wonderful way to wrap up the year.


Sunday, September 8, 2013

D.A.R. shares Tastes & Treasures cookbook


Betsy Davis, Curator of the historic L. Ron Hubbard House, Historical League member and member of the Camelback Chapter of the DAR, presented the Tastes and Treasures cookbook as a Thank You gift at a recent DAR function.  Kathy, the AZ State DAR Chairman for American Heritage, and Ann Brandes, the hostess of the function and Vice Regent of the Camelback DAR chapter, received the cookbook with enthusiasm!

Betsy comments, "I explained to both of them what the cookbook is and what was in it and they both absolutely loved it.  Kathy asked me how she could get more and I showed her the literature on the League and the cookbook that you gave me to include with the books, specifically that little postcard about the cookbook, and she was very happy so you may get some future orders from her.  Ann, the lady who was the hostess, also really loved hers and sent me an email exclaiming how interesting it was and how good the recipes looked."

Sunday, August 25, 2013

Betsy Davis' Homemade Chocolate Cream Pie

Homemade Chocolate Cream Pie from Betsy Davis was a mouth-watering dessert served at the June Historical League meeting.

Try this recipe as well as Chocolate Lovers Delight Pie on page 152 of Tastes & Treasures cookbook.

Homemade Chocolate Cream Pie
Ingredients:
1 cup chocolate cookie crumbs
5 Tbs butter
2/3 cup sugar plus 1 tablespoon sugar
1/4 cup cornstarch
1/4 cup cocoa powder
1/4 teaspoon salt
2 1/2 cups evaporated milk
1/2 cup chocolate chips
1 teaspoon vanilla
1 cup whipping cream


Directions:
Crust: Melt butter in a microwave safe dish.  Mix with the cookie crumbs until well blended.  Reserve 1 Tbs of crust mixture for topping later.  Press the rest into a 9" pie plate to form the crust and place in the refrigerator.

Filling: In a medium saucepan, whisk together the 2/3 cup sugar, cornstarch, cocoa powder, and salt.
Whisk in the milk, stirring well. Cook over medium-high heat, whisking constantly until mixture begins to thicken, about 5 to 7 minutes.
Whisk in chocolate chips and vanilla until melted and well blended. Allow mixture to cool slightly.
Pour cooled mixture into the pie shell. Cool to room temperature and then chill for several hours.
Prior to serving, whip the cream and the remaining tablespoon of sugar in a medium bowl until soft peaks are formed. Spoon over the chocolate to form the topping.  Sprinkle with reserved cookie crumbs.
It's the evaporated milk that makes it killer :)

Tuesday, August 13, 2013

Betsy Davis enthusiastic about DAR

Belonging to such an historic group as the Daughters of the American Revolution, Historical League member Betsy Davis is enthusiastic about history. Tastes & Treasures A Storytelling Cookbook of Historic Arizona fits right in with both groups. The DAR is gifting the cookbook as a "Thank You" for their hosts and guest speakers. One non-profit helping another!

Friday, December 3, 2010

Briar Patch Marketplace cookbook booth


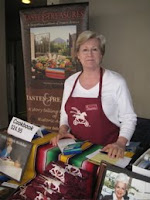
Carolyn Mendoza did a wonderful job again over Thanksgiving weekend at Briar Patch Marketplace at Sequoya School in Scottsdale. Along with volunteers Betsy Davis, Sharron McKinney, Mary Garbaciak and Margaret Pogue, she sold $700 worth of books, aprons and hats.

Briar Patch has some wonderful gift ideas for the holidays and Tastes & Treasures cookbook is a good choice for gift giving. The Historical League thanks Briar Patch organizer Jeannie Cueto for allowing us to present the Historical League items and brochures to the public.

Thursday, May 27, 2010

Betsy Davis brings Berry Fruit Salad


Berry Fruit Salad with Mint Sugar pg 118, Tastes & Treasures is a refreshing easy summer salad. One of the wonderful recipes from Rancho de La Osa, Betsy made it for a Historical League meeting. This dude ranches has a lot more to offer than just horse back riding. The food served there is very good.

1/2 cup loosely packed fresh mint
6 tablespoons sugar
3 cups sliced strawberries
3 cups blackberries
3 cups blueberries

Pulse the mint and sugar in a food processor until finely ground. Sprinkle over the strawberries, blackberries and blueberries in a large bowl and toss gently to combine. Let stand for 5 minutes before serving.

Serves 8.

Saturday, April 10, 2010

Elisabeth Ruffner, Guest Speaker

Elisabeth Ruffner, 2008 Historymaker, was the guest speaker at the Historical League meeting on April 5. She continues to inspire us with her efforts to preserve history and share it with others.

Elisabeth initiated the formation of Arizona Centennial committees for both Prescott and Yavapai County and serves as vice-chair of each. She gave her slide presentation entitled, "Yavapai: Mother of Counties, Cradle of Statehood". This is a State Centennial project for which she is seeking legacy and status as a Historian.
Photo shows Dinny Henze, Elisabeth and Kathleen Fischer.

Lunch is always popular prior to the meeting. Elisabeth and League members enjoyed Tomato, Mozarella and Basil Salad, Fresh Tossed Salad with Strawberries, Cabbage/Beet salad and so many more salads.


Betsy Davis made Berry Salad from Rancho de La Osa found in Tastes & Treasures cookbook.


Berry Fruit
Salad with Mint Sugar page 118

1/2 cup loosely packed fresh mint
6 tablespoons sugar
3 cups sliced strawberries
3 cups blackberries
3 cups blueberries

Pulse the mint and sugar in a food processor until finely ground. Sprinkle over the strawberries, blackberries and blueberries in a large bowl and toss gently to combine. Let stand for 5 minutes before serving.

Serves 8.

Saturday, February 13, 2010

Betsy Davis Lemon Bars

Lemon Bars

Can't you just smell that wonderful aroma of lemon bars baking in the oven?

Betsy Davis is great about contributing food to the Historical League functions. This was her recipe from the February meeting. It was finger licking good. Sweet and Tart.

Crust
2 cups flour
1/2 cup confectioners sugar
2 sticks butter

Topping
2 cups sugar
1 Tbs flour
1 tsp baking powder
1/4 tsp salt
4 eggs well beaten
1 heaping Tbs grated lemon rind
1/4 cup lemon juice

Preheat oven to 300 degrees. Mix flour and powdered sugar together. Cut in butter until well blended. Press mixture over bottom of a 9 x 13 x 2 inch pan. Bake about 25 minutes until lightly browned.

Preheat the oven to 350 degrees. Combine the remaining ingredients and spread on top of the baked crust. Bake for 25 to 30 minutes. Sprinkle with powdered sugar.

Betsy’s Note: if they come out too runny, I haven't baked them long enough or didn't have the oven all the way preheated when I started the baking. If I make sure the oven is at 350 and bake them for 30 minutes, they come out fine.

Friday, September 18, 2009

League Members Bring Cookbook Recipes to Meeting

Lunch is always a great reason to attend the monthly Historical League meetings. Monday, September 14 was no exception with Zona Lorig bringing Romaine Salad with Hearts of Palm and Artichokes pg 160. Yumm. It was delicious and almost all gone by the time I got to the buffet table.

Tobe Daum prepared Blueberry Muffins La Posada pg 62. No wonder the Harvey Girls were so popular, serving such a wonderfully light muffin packed with blueberries. After one taste, I realize why I do not buy muffins in the store.


El Chorro's historic recipe for Tastes & Treasures cookbook for dessert is Chocolate Icebox Cake pg 80. Betsy Davis prepared this 'melt in your mouth' cake and it makes me smile to think of the old Icebox style refrigerators. We have come a long way with convenience appliances but an old fashioned Icebox would still work quite well for this great treat.

Tuesday, June 2, 2009

Staff Appreciation Luncheon


It is always a great day to see the fruits of our fundraising labors when we present the Grant money to the Museum staff. This year over $69,000 was awarded from the Historical League at the June meeting. We enjoyed lasagna, rolls and salads for this luncheon. One favorite was Romaine Salad with Two Cheeses from page 169 of Tastes & Treasures thanks to Betsy Davis. She told me she couldn't find Beau Monde seasoning at the store but looked it up on the internet and made it herself. Very resourceful lady.
3/4 cup olive oil
1/2 cup (2 oz) shredded Parmesan cheese
1/4 cup (1 oz) shredded Romano cheese
2 avocados, chopped
6 green onions, chopped
juice of 2 lemons
2 teaspoons Beau Monde seasoning
1/4 teaspoon salt
2 heads romaine, trimmed and torn into bite-size pieces.
Combine the olive oil, Parmesan cheese, Romano cheese, avocados, green onions, lemon juice, Beau Monde seasoning and salt in a large bowl and mix well. Arrange the romaine over the top; do not mix. Chill, covered for 4-24 hours. Toss just before serving. Serves 6 to 8.

Friday, April 3, 2009

Tour of Phoenix Children's Museum


Wish I had grand children to take to this place. What fun. I wanted to climb with the kids, plant flowers, slide, chase the air machine scarves and ride the tricycle/segway. The Historical League had a tour in March with guide Kathie Hughes sharing so much information and history. The museum started with an idea from two Phoenix families vacationing. "Why doesn't Phoenix have a Children's Museum like San Diego?" The historic Monroe school was available and so it began...All the exhibits are educational and thoroughly researched for the appropriate age levels. Open since June 2008, 250,000 guests have gone through it.
The noodle forest (9,000 pool noodles) is mine and Jeannie Fletcher's favorite (and also most of the children) although the grocery store is a close second. Betsy Davis holds a plastic carrot that was so real she commented, "looks like the carrot from the bottom of the crisper drawer."
Delores Tomasek is removing the heart and liver from Mr Stuffy as she learns about anatomy.
Marlyse Brock, Betsy Davis, Nancy Evans and Janie Burke enjoy the giggle box covered with Jackson Pollack artwork in the dining area. It was a fun filled, informative tour and one I would love to take again...just need that grandchild.