Thursday, December 30, 2010

Flavorful Marinara Sauce

Italians know how to cook. It must be born in them because everything Mariann prepares is savory and delicious.

Mariann’s Marinara Sauce


Ingredients
3 tbsp olive oil
½ large yellow onion, chopped
4-5 cloves garlic, sliced
1 can crushed tomato
2 fresh Roma tomatoes
1 tsp capers
½ cup sliced black olives
¼ cup fresh chopped parsley
1 tsp sugar
1 tsp balsamic vinegar
dash salt
dash pepper
crushed red pepper flakes to taste
Directions
Saute onion in olive oil until soft. Add garlic and sauté until it begins to turn golden on edges. Add can tomatoes, fresh tomatoes, then remainder of ingredients.
Let simmer on low for 30-40 minutes. Pour over cooked pasta and enjoy.

Tuesday, December 28, 2010

Make Ahead Breakfast Egg Dish


Company coming and you want an easy, make ahead breakfast? This is the one.

Page 196 of Tastes & Treasures A Storytelling Cookbook of Historic Arizona has a delicious recipe to feed 6 with 4 eggs. We modified it a little adding sliced fresh mushrooms and ham. Get creative and find out how interesting flavors combine to make this a wonderful breakfast.

Sunday, December 26, 2010

Feast of the Seven Fishes


Traditional Christmas Eve for Italians is often centered around the Feast of the Seven Fishes. No dairy or meat should be involved. The feast this year featured grilled seasoned shrimp, fried smelt, crab cakes, baccala (dried salt cod ), followed with lobster, mussels and scallop pasta in marinara sauce. With friends and neighbors stopping by for dinner and good will, the Feast was welcomed by all.

The Crab Cakes recipe from The Cottage Place Restaurant in Flagstaff can be found on page 28 in Tastes & Treasures cookbook.
Crab Cakes with Corn Sauce

Corn Sauce
1/2 cup marsala
2 tablespoons chopped shallots
2 teaspoons salt
1/4 teaspoon white pepper
3 cups whipping cream
1/2 cup water
1 cup roasted corn kernels or frozen roasted corn kernels, thawed
1/4 cup all purpose flour
2 tablespoons butter, melted

Crab Cakes
1 pound crab meat, shells removed and crab meat flaked
1 rib celery, chopped (about 1/2 cup)
1/4 cup chopped red bell pepper
1 cup fresh corn kernels or frozen corn kernels, thawed
1 teaspoon horseradish
1 1/2 teaspoon Dijon mustard
1 tablespoon lemon juice
1 teaspoon grated lemon zest
2 tablespoons chopped fresh chives
1/2 teaspoon salt
1/4 teaspoon freshly ground black pepper
Pinch of cayenne pepper
2 cups panko (Japanese bread crumbs)
2 eggs
1/2 cup Clarified Butter (page 29)

For the corn sauce, bring the wine, shallots, salt and white pepper to a boil in a large saucepan. Cook until the mixture is reduced by one-half. Add the cream and water and return to a boil. Stir in the corn. Mix the flour and butter together and whisk into the boiling sauce. Reduce the heat and simmer for 20 minutes. Pour into a blender and process until pureed. Adjust the seasonings to taste and strain into a bowl. Keep warm.

For the crab cakes, combine the crab meat, celery, bell pepper, corn, horseradish, Dijon mustard, lemon juice, lemon zest, chives, salt, black pepper, cayenne pepper, 1/2 cup of the panko, 1/2 cup of the corn sauce and the eggs in a large bowl and mix thoroughly. Adjust the seasonings to taste. Divide the crab meat mixture into sixteen 2-ounce balls. Gently shape each ball into a round cake about 1/2 thick. Dredge the crab cakes in the remaining 1 1/2 cups panko, gently pressing to adhere. Heat a large skillet over high heat. Cover the bottom of the skillet with the clarified butter. Add the crab cakes and fry for 2 to 3 minutes per side or until golden brown. Drain on paper towels.

To serve, ladle 1/4 cup of the remaining corn sauce on each serving plate and plate the crab cakes in the pool of sauce.

Makes 16 appetizer-size crab cakes

Friday, December 24, 2010

Fixated on Fritatta


What to do with those left over vegetables? Make a fritatta. This one was filled with goodies to make a hearty breakfast.

Using a ovenproof pan or cast iron skillet, saute chopped yellow pepper in olive oil. Add precooked bacon, spinach, broccoli, potatoes, chicken, what ever you have. Pour egg whites over the mixture to barely cover and sprinkle with salt and cayenne pepper.

Bake 350 degrees for about 20 minutes.

Also check out some great Egg Dishes in Tastes & Treasures A Storytelling Cookbook of Historic Arizona. Page 195 has a wonderful, easy Breakfast Casserole. And Southwestern Bacon and Cheese Strata on page 118 from Rancho de La Osa has a spicy kick. Enjoy.

Wednesday, December 22, 2010

Crab Cakes

Recipes are meant to share, especially one low in calories and fat that tastes delicious. These Crab Patties are from www.hungrygirl.com. Tastes & Treasures cookbook has two crab cake recipes. One from The Cottage Place in Flagstaff is on page 28. Dungeness Crab Cakes are on page 82 from El Chorro Lodge. Try all three recipes for a taste test and enjoy.

Ingredients:
Two 6-oz. cans lump crabmeat, drained (about 1 cup drained crabmeat)
2 1/2 slices light white bread (40 - 45 calories each with around 2g fiber per slice), lightly toasted
One wedge The Laughing Cow Light Original Swiss cheese, room temperature
3 tbsp. fat-free liquid egg substitute (like Egg Beaters Original)
2 tbsp. finely diced onion
2 tbsp. finely diced celery
1 tbsp. fat-free mayonnaise
1/2 tbsp. Dijonnaise
1/2 tbsp. finely chopped fresh curly parsley
1 tsp. minced garlic
1/2 tsp. lemon juice
1/2 tsp. whipped light butter or light buttery spread (like Brummel & Brown), melted
1/4 tsp. Worcestershire sauce
dash hot pepper sauce (like Tabasco)
dash salt, or more to taste
dash black pepper, or more to taste
Butter-flavored nonstick spray
Optional: additional Dijonnaise (for dipping), lemon wedges
Directions:
Preheat oven to 450 degrees.
Tear lightly toasted bread into pieces and place in a food processor or blender. Pulse until reduced to breadcrumbs, and then transfer to a medium bowl.
Add crabmeat, parsley, garlic, salt, and black pepper to the bowl, and gently mix until combined. Add onion and celery, lightly mix again, and set aside.
Break cheese wedge into pieces and place in a small bowl. Add egg substitute, mayo, Dijonnaise, lemon juice, melted butter, Worcestershire sauce, and hot pepper sauce. Whisk until smooth, and pour over the crabmeat mixture. Using a rubber spatula, gently fold the liquid mixture into the crabmeat mixture. If you like, add additional salt and black pepper to taste.
Prepare a medium-large baking dish by spraying with butter-flavored nonstick spray. Take one-third of the crab cake mixture (about 3/4 cup) from the bowl. Gently form it into a ball, place it in the baking dish, and flatten it into a cake about 1-inch thick -- repeat twice with remaining crab mixture so that you have 3 cakes in the baking dish.
Bake in the oven for 14 - 15 minutes, until the cakes are slightly firm and cooked through.

Remove carefully from the dish and serve with additional Dijonnaise for dipping and/or lemon wedges for squirting.

MAKES 3 SERVINGS
Serving Size: 1 crab cake
Calories: 117 Fat: 2g Sodium: 799mg Carbs: 11.5g Fiber: 2.25g Sugars: 2.5g
Protein: 14g POINTS® value 2*

Saturday, December 18, 2010

Prickly Pear Jelly


How to harvest Prickly Pears and not get injured? The education department at the Arizona Historical Society tells us not only that but gives us a recipe for the jelly - A little learning plus delicious food at www.arizonahistoricalsociety.org

Prickly Pear is a cactus that grows in Arizona. It has flat, rounded pads, orange and yellow flowers, and sweet, purplish fruit. Since the prickly pear cactus needs plenty of sun, sandy soil, and very little water to grow, Arizona is the perfect home for this cactus.

The prickly pear cactus is a source of food for many animals and people in the desert. One treat many people of the Southwest enjoy comes from the fruit of this cactus is Prickly Pear Jelly.

Prepare Fruit:
- Wearing gloves and using tongs, gather about 2 quarts of pears, including a few that are not fully ripe.
- Hold pears under running water and scrub with a brush to knock off small stickers.

Or purchase prepared fruit at Arizona Cactus Ranch, (800) 582-9903, www.arizonacactusranch.com


You Need:

2 quarts prickly pears
1 ¾ ounces powdered pectin (a gelling agent for jams and jellies, can be purchased at your local grocery store with canning supplies )
3 tablespoons lemon or lime juice
3 ½ cups sugar

Step 1: Without peeling, slice pears in large pieces and put in large kettle with enough water to
barely cover.

Step 2: Boil until tender, about 20 to 25 minutes.

Step 3: Press with potato masher and strain through jelly bag or 2 thicknesses of cheesecloth.
Spines will come off fruit during this process.

Step 4: To a pan add 2 1/2 cups juice, and 1 3/4-ounce powdered pectin.

Step 5: Bring to fast boil, stirring constantly.

Step 6: Add 3 tablespoons lemon or lime juice and 3 1/2 cups sugar.

Step 7: Bring to hard boil.

Step 8: Cook for 3 minutes at a rolling boil.

Step 9: Remove from heat, skim and pour into sterilized jelly glasses. Seal at once with 1/8-
inch melted paraffin, a wax that prevents the jelly from going bad (can be purchased at your local grocery store with canning supplies).

*Recipe from Fruits of the Desert by Sandal English.

Thursday, December 16, 2010

Easy Sticky Buns


Love the sticky buns from historic El Chorro restaurant? Here is a simpler version. The education department at the Arizona Historical Society also gives us a mini lesson about the Arizona Walnut tree at www.arizonahistoricalsociety.org

EASY STICKY BUNS

The Arizona Walnut is a type of tree that grows in Arizona. The Arizona Walnut grows very slowly and can live well over 20 years. When this tree is fully grown it can be 50 feet tall. In the spring and summer, the Arizona Walnut has yellow-green leaves and small brown flowers. During the fall and winter, the tree looses its leaves and the brown flowers become brown seeds, called walnuts.1 With these walnuts you can make delicious goodies like sticky buns.

You need:

1 cup walnuts, finely chopped
1 package frozen yeast rolls (about 18)
1 ½ cups butter (2 ½ sticks)
½ cup packed brown sugar
1 (4 oz) package butterscotch pudding and pie filling mix
2 teaspoons ground cinnamon

Step 1: Spread the walnuts over the bottom of a bundt pan sprayed with nonstick
cooking spray and top with the yeast rolls.

Step 2: Cook remaining ingredients, butter, brown sugar, butterscotch mix, and cinnamon, in a saucepan until blended, stirring frequently.

Step 3: Pour over the prepared layers.

Step 4: Let rise, covered with plastic wrap and a kitchen towel, for 8 to 10 hours.

Step 5: Preheat the oven to 350 degrees and bake for 20 to 25 minutes.

Step 6: Let stand for 15 minutes and then turn upside down onto a serving platter.
Serve immediately. Serves 12.

*Recipe from Tastes & Treasures: A Storytelling Cookbook of Historic
Arizona by the Historical League, Inc. Available for purchase at the Arizona
Historical Society Museum at Papago Park, (480) 929-0292.

Tuesday, December 14, 2010

Kabobs on the Grill

Chicken, steak, cherry tomato, mushroom, onion, zucchini, red pepper . . . let your imagination run wild with yummy vegies to add to the kabobs. And don't let the winter cold stop you from the BBQ. Bundle up and enjoy the grill year round.

Of course, the Herb-Roasted Vegetables from the Cottage Place in Flagstaff uses an oven to make a great side dish. Check out page 24 of Tastes & Treasures if you want to stay indoors and stay warm.

Sunday, December 12, 2010

Mesquite Pancakes

Looking for an activity to do with your children? Thanks to the education department at the www.arizonahistoricalsociety for telling us about the history of the Mesquite Tree while we make delicious pancakes:

Mesquite Trees are common in Arizona. They have ferny, bright green leaves, long pale yellow seedpods, and trunks that separate into branches just above the ground. They grow well in Arizona because they need a lot of sunshine and not much water.

When the seedpods ripen and fall of the trees, some people think they are litter. However, there are others who are excited at the sight of fallen seedpods because they turn these pods into flour in order to make delicious treats, like pancakes.

Prepare Beans:
-Rinse beans under running water to remove dirt and rocks
-Pick out anything that is not a mesquite bean
-Place beans in an oven-proof container or on a foil-lined oven rack
-Make sure water is not dripping off the beans and collecting in the bottom of the pan
-Cook at 150° F until crispy dry-may take-2 to 4 hours (The beans should not actually cook-they may caramelize if cooked at too high a temperature due to high sugar content)

Prepare Flour:
-Place about 15 beans into a blender
-Blend for approximately 20 to 30 seconds (if ground too long, the seeds will be ground up as well and they are VERY bitter)
-Sift through strainer to separate larger pieces of the seedpods from the fine powder, which is the mesquite flour
-Place the mesquite flour in a bag and store in the freezer until needed

Or purchase mesquite flour at Native Seeds Search, 526 N. 4th Ave. Tucson, AZ 85705, www.nativeseeds.org

You Need:

3/4 cup mesquite flour
1 cup flour
1 tsp baking powder
1/2 tsp salt
1 Tb sugar
1 tsp vanilla
2 eggs
1 to 2 cups milk

Step 1: Mix mesquite flour, flour, baking powder, salt, and sugar first.

Step 2: Mix in vanilla and eggs.

Step 3: Mix in milk until desired thickness is acquired.
*The thinner the mix, the thinner the pancakes, the thicker the mix, the thicker
the pancakes.

Step 4: Spoon onto a hot griddle and flip when batter
begins to bubble.

Step 5: Serve with butter and honey or syrup.

Makes 12 - 18 pancakes


*Recipe courtesy of Martha Darancou Aguirre of Rancho la Inmaculada.

Tuesday, December 7, 2010

Tangy Tomato Aspic

Canadian Thanksgiving is on a different day than American Thanksgiving but historic recipes are welcome in any country. This one stands the test of time.
Calgarian Georgia DesMarais had a hard time finding a "jelly" pan in the USA but found a bundt pan was a good alternative.


TANGY TOMATO ASPIC from Georgia Desmarais


1 & 1/4 CUPS BOILING WATER
1/2 t ONION JUICE
1 PACKAGE LEMON JELLO (3 OZ)
1/8 t RED PEPPER SAUCE
1 CAN TOMATO SAUCE (8 OZ)
DASH CLOVES
1 & 1/2 T VINEGAR
2 CUPS DICED CELERY
1/2 t SALT
1 LB DICED SHRIMP

Pour boiling water over gelatin in bowl, stirring until gelatin is dissolved. Stir in tomato sauce, vinegar & seasonings. Pour into a jelly mold and refrigerate until set.

Combine celery, shrimp and a little mayo in bowl and mix. Unmold aspic on plate and mound shrimp mixture in center. Serve with lemon wedges.

Sunday, December 5, 2010

Mesquite cookies

Did you know you can use Arizona's Mesquite Tree seedpods and make your own flour just like the native peoples did? The following recipe is available at www.arizonahistoricalsociety.org thanks to the AHS education department. Their website has many activities for children and adults to do together while they learn about Arizona history and horticulture.

Mesquite Trees are common in Arizona. They have ferny, bright green leaves, long pale
yellow seedpods, and trunks that separate into branches just above the ground. They
grow well in Arizona because they need a lot of sunshine and not much water.

When the seedpods ripen and fall of the trees, some people think they are litter.
However, there are others who are excited at the sight of fallen seedpods because they
turn these pods into flour in order to make delicious treats, like cookies.

Prepare Beans:
-Rinse beans under running water to remove dirt and rocks
-Pick out anything that is not a mesquite bean
-Place beans in an oven-proof container or on a foil-lined oven rack
-Make sure water is not dripping off the beans and collecting in the bottom of the pan
-Cook at 150° F until crispy dry-may take-2 to 4 hours (The beans should not actually cook-they may caramelize if cooked at too high a temperature due to high sugar content)

Prepare Flour:
-Place about 15 beans into a blender
-Blend for approximately 20 to 30 seconds (if ground too long, the seeds will be ground up as well and they are VERY bitter)
-Sift through strainer to separate larger pieces of the seedpods from the fine powder, which is the mesquite flour
-Place the mesquite flour in a bag and store in the freezer until needed

Or purchase mesquite flour at Native Seeds Search, 526 N. 4th Ave. Tucson, AZ 85705, www.nativeseeds.org

You Need:
¾ cup margarine
¾ cup sugar
½ cup mesquite flour
1 ½ cup flour
1 teaspoon cinnamon
2 eggs

Step 1: Cream sugar and margarine together.

Step 2: Add eggs and mix well.

Step 3: Sift mesquite flour, flour, and cinnamon in and mix.

Step 4: Bake on greased cookie sheet at 375 degrees for 8-10 minutes.

Friday, December 3, 2010

Briar Patch Marketplace cookbook booth


Carolyn Mendoza did a wonderful job again over Thanksgiving weekend at Briar Patch Marketplace at Sequoya School in Scottsdale. Along with volunteers Betsy Davis, Sharron McKinney, Mary Garbaciak and Margaret Pogue, she sold $700 worth of books, aprons and hats.

Briar Patch has some wonderful gift ideas for the holidays and Tastes & Treasures cookbook is a good choice for gift giving. The Historical League thanks Briar Patch organizer Jeannie Cueto for allowing us to present the Historical League items and brochures to the public.

Wednesday, December 1, 2010

Museum website recipes for kids

4th graders can learn Arizona history with the help of the www.arizonahistoricalsociety.org. It contains interesting stories, projects and recipes for children and parents to work together. The education department has done a great job to make this informative and fun for the whole family.

The Indian Fry Bread recipe is easy and delicious. Be careful to supervise children around the hot oil while frying.

Indian Fry Bread
Many American Indian tribes in Arizona make fry bread. Today you can taste fry bread
at many American Indian festivals and celebrations.

You Need:

Shortening for deep-frying
7 cups all-purpose flour
1 ½ teaspoons baking powder
½ teaspoon salt
½ cup milk
½ cup water

Step 1: Heat the shortening in a deep fryer, skillet, or frying pan.

*Note: To fry in a skillet, add enough shortening to fill the skillet about 1 inch.

Step 2: Mix the flour, baking powder and salt in a bowl.

Step 3: Add the milk and water and mix to form firm dough.

Step 4: Pinch off a baseball-size piece of the dough and roll or shape by hand to the
size of a dinner plate.

Step 5: Deep-fry until the bread is golden brown.

*Note: Fry the dough in the hot shortening until golden brown, turning after 15
to 20 seconds.

Step 6: Drain on paper towels.

Step 7: Repeat with the remaining dough.

Step 8: Serve hot with honey or powdered sugar.

* Recipe from Cameron Trading Post found on page 14, Tastes & Treasures: A Storytelling Cookbook of Historic Arizona by the Historical League. Available for purchase at the Arizona Historical Society Museum at Papago Park, (480) 929-0292.

Monday, November 29, 2010

ArtFest a Success


Scottsdale's ArtFest at the Civic Center library is a wonderful opportunity to showcase Tastes & Treasures cookbook. Carolyn Mendoza did a fabulous job of running the sales and co-ordinating volunteers to man the booth for two days with very good results. Despite the wind and weather forcing an early closure on Sunday, the Historical League brought in $960 worth of sales of cookbooks, Centennial aprons and baseball caps. We are also able to "spread the word" about the Historical League, AHS Museum at Papago Park, Historymakers Centennial Gala and Children's Holiday Party. With lots of help setting up the tent, it was a fun event. Thanks to volunteers: Margaret Pogue, Linda Isaksen, Pam Ryan, Judy Yauch, Steve Yauch, Al McLeod, Deb Hester, Ruth Ann Hogan, Nina Fillips, Mariamne Moore and Bonnie Newhoff. We couldn't do it without you.

Saturday, November 27, 2010

Crab Stuffed Mushrooms


Appetizers are always popular but with this recipe, they are also lower in fat and calories.


Try this wonderful cheesy treat from www.hungrygirl.com. It is a variation of the Stuffed Mushrooms from The Cottage Place Restaurant, page 27 Tastes & Treasures.

Crab-Stuffed Mushrooms

Ingredients:
12 small-to-medium-sized (1 - 2" wide) brown mushroom caps (stems removed)
2 oz. drained white crabmeat
2 tbsp. celery; minced
2 tbsp. red pepper; minced
1 wedge The Laughing Cow Light Cheese (any Light flavor)
1 tbsp. fat-free sour cream
1 tbsp. fat-free cream cheese
2 tsp. fat-free cheese flavor sprinkles (Molly McButter)
Directions:
Preheat oven to 375 degrees. Wipe mushrooms clean with a damp paper towel and then dry them. Place with the rounded sides down on a baking dish sprayed lightly with nonstick spray. Combine all other ingredients and stir until well mixed. Evenly distribute crab mixture among the mushroom caps. Place in the oven for 10 - 12 minutes, until hot.

Makes 12.
Hint: A pastry bag is great to pipe the filling into the mushrooms. If you don't have one, use a zip loc bag and cut a hole in one corner. Line the hole with duct tape to give it strength so it won't split open.

(Entire recipe: 135 calories, 3g fat, 975mg sodium, 12g carbs, 2g fiber, 4g sugars, 16g protein = 3 Points)

Wednesday, November 24, 2010

Baked Brie with Fresh Cranberries


Fresh from the oven, the presentation of this colorful dish is fabulous. Leslie Christiansen gave us this delicious appetizer that her whole family enjoys.

Another method of serving this is to scoop out a round loaf of sourdough bread and bake the brie cheese and toppings inside the hollowed out bread. Then use the bread cubes to serve the brie. Wonderful for the Holidays or any special time.

BAKED BRIE WITH FRESH CRANBERRIES

Ingredients:
19 oz Wheel of Brie
½ bag of fresh cranberries, rinsed
½ cup raisins, golden or regular
½ cup brown sugar
½ t cinnamon
½ cup orange juice
½-1 cup black berries
½-1 cup blueberries
Crackers or sliced baguette


1. Preheat the oven to 325 F.
2. Place cranberries, raisins, brown sugar, cinnamon and orange juice in a sauce pan, stirring to combine.
3. Bring to a boil; as the cranberries begin to burst, reduce the heat to a simmer.
4. Continue to cook until the liquid has thickened to a syrup; about 10 minutes, stirring occasionally.
5. Remove from the heat and stir in the fresh berries.
6. Meanwhile, cut the top off the wheel of brie, leaving the sides of the cheese intact. Place brie in an ovenproof serving dish with sides.
7. Pour the cranberry mixture over the brie; it’s ok if the mixture tumbles over the sides a little bit. Place the brie in the oven.
8. Bake until the cheese begins to bubble, about 15-20 minutes.
9. Serve with your favorite crackers or bread.

Saturday, November 20, 2010

Coconut Shrimp for Snacking

Sweet Coconut Crunch Shrimp

This crunchy and delicious shrimp is hard to pass up. Thanks to www.hungry-girl.com for giving us a guilt free version of coconut shrimp. Another unique shrimp recipe comes from La Posada Hotel, Sherried Shrimp with Capers, page 60, Tastes & Treasures cookbook.

Ingredients
1/4 cup Fiber One bran cereal (original)
1/3 cup shredded sweetened coconut
3 tbsp. panko breadcrumbs
1/4 tsp. chili powder
1/8 tsp. garlic powder
1/8 tsp. black pepper
Dash salt
12 oz. (about 20) raw large shrimp, peeled, deveined, tails removed
3 tbsp. fat-free liquid egg substitute (like Egg Beaters Original)

Note: If your coconut shreds are somewhat long, give them a rough chop.

Directions
Preheat oven to 400 degrees.
Place cereal in a sealable plastic bag and, removing as much air as possible, seal. Using a meat mallet or heavy can, carefully crush cereal through the bag. Add sweetened coconut, panko breadcrumbs, chili powder, garlic powder, black pepper, and salt to the bag; seal and shake to mix. Transfer mixture to a large plate and set aside.

Spray a large baking sheet with nonstick spray and set aside. Pat shrimp with paper towels to ensure they are completely dry.

Combine shrimp with egg substitute in a bowl and toss lightly to coat. One at a time, shake excess egg from shrimp and transfer to the coconut-crumb mixture, gently patting and flipping to coat. Evenly place coated shrimp on the baking sheet.

Bake in the oven for 10 - 12 minutes, until outsides are crispy and lightly browned and insides are cooked through. Serve and enjoy.

MAKES 4 SERVINGS

Serving Size: 1/4th of recipe, about 5 shrimp
Calories: 164
Fat: 4.5g
Sodium: 266mg
Carbs: 12g
Fiber: 2g
Sugars: 3.5g
Protein: 19.5g

POINTS® value 3*

Thursday, November 18, 2010

Michigan Salad

Filled with fruit and vegetables, this salad takes the Michigan name from the dried cherries. It is easy to make and fun to vary the ingredients. Start with different types of romaine, butter, spring mix lettuce. Add mango, dried cherries, mandarin orange sections, blueberries, golden raisins, strawberries, candied walnuts, and provolone cheese strips. Top with grilled sliced chicken breast and serve with Poppy Seed Dressing.

Tuesday, November 16, 2010

Pumpkin Muffins


This yummy and low calorie treat is from www.hungrygirl.com. Very comparable to Great Pumpkin Cookies, an old family recipe from League member Kay Holcombe, found in Tastes & Treasures page 162.

Pumpkin-Bread Muffins

Ingredients:
Muffins
1 cup Fiber One Original bran cereal
1 1/2 cups whole-wheat flour
1/2 cup Splenda No Calorie Sweetener (granulated)
1/4 cup brown sugar (not packed)
1 tbsp. baking powder
2 tsp. cinnamon
1/2 tsp. pumpkin pie spice
1/4 tsp. salt
One 15-oz. can pure pumpkin
1 cup club soda
1/2 cup fat-free liquid egg substitute
1/4 cup sugar-free pancake syrup
1 tsp. vanilla extract
1/4 cup raisins, chopped

Icing
1/4 cup Cool Whip Free, thawed
3 tbsp. fat-free cream cheese, room temperature
1 tbsp. Splenda No Calorie Sweetener (granulated)

Directions:
Preheat oven to 350 degrees. Line 10 cups of a 12-cup muffin pan with baking cups and/or spray with nonstick spray. Set aside.

Using a blender or food processor, grind cereal to a breadcrumb-like consistency. Transfer crumbs to a large bowl.
 Add flour, Splenda, brown sugar, baking powder, cinnamon, pumpkin pie spice, and salt. Mix well and set aside.

In another bowl, combine pumpkin, soda, egg substitute, syrup, and vanilla extract. Mix thoroughly. Add mixture to the large bowl and stir until blended to form the batter.

Slowly sprinkle and stir chopped raisins into the batter. Evenly distribute batter among the 10 prepared cups of your muffin pan.

Bake in the oven until muffins are golden brown and a toothpick inserted into the center of one comes out mostly clean, about 30 minutes. Set aside to cool.

Meanwhile, combine all icing ingredients in a small microwave-safe bowl. Mix until smooth and blended. Refrigerate until ready to use.

Remove cooled muffins from the pan. Just before serving, warm icing in the microwave for a few seconds and drizzle it onto the muffins.

MAKES 10 SERVINGS

Serving Size: 1 iced muffin
Calories: 137, Fat: 0.75g, Sodium: 260mg, Carbs: 32g, Fiber: 6.75g, Sugars: 9g , Protein: 5.5g
POINTS® value 2*

Historic Jerome Tour


The bus was filled as we drove to historic Jerome. Pam Ryan and Jeannie Fletcher had delicious breakfast snacks for the 7 am departure but we were looking forward to the history of "The Honeymoon Cottage of Jerome". The tour conducted by owner Margaret Graziano, told the story of purchasing the run down home and recreating the magnificent structure that it once was. Lots of labor, inspiration, money and perserverence went into the work but it was worth it. Today the French Country house is fully restored. It is decorated in Victorian style with a large patio and sweeping views of the Verde Valley.

Built in 1921 by James Dougles, the owner of the Little Daisy Mine, gave the home to his son as a wedding gift. At one time the Little Daisy Mine was the largest producer of copper in the world.

Sunday, November 14, 2010

Mystery Ingredient for Red Velvet Cake


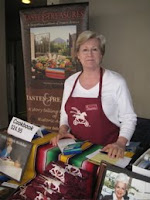
Leslie Christiansen gave us this fabulous historic recipe. She commented, "I've taught both recipes at the culinary school. They are just a little bit different- I modified the one for the cupcakes. The cake batter looks dark maroon before it bakes, but turns brown in the oven.

I did a lot of research on food coloring and the history of the Red Velvet Cake before bringing the recipe to the culinary school. I wanted to avoid the red food coloring- and was so excited to find the recipe with the beets!

There are 2 basic recipes for the Red Velvet Cake, the more popular one uses baking soda, cocoa powder, buttermilk, and LOTS of red food coloring.

Both Red Velvet Cakes are delicious, but I like to have fun with the beets. I brought the cupcakes to the students and told them there was a mystery ingredient; none of them could guess what it was. But when they found out it was beets, they couldn't wait to make them and take them home to their families.

The Red Velvet Cake recipe I use was made famous from the Waldorf Astoria Hotel. The story goes that beets were substituted for sugar during WWI when sugar was rationed, and they added a pleasant red coloring to cakes. Maybe if chocolate wasn't added, the pink beet color might remain..

In the earlier days, the red dye used to color foods was found to be poisonous to humans. The red food coloring today is supposed to be safe, but I wasn't convinced after much research, and won't use it. You can buy dried beet powder online, and beet juice is a fun food coloring. Sometimes I add a little bit to the frosting."

RED VELVET CAKE FROM THE WALDORF ASTORIA HOTEL

Cake Ingredients:
4 oz unsweetened chocolate
2 cups sugar
4 eggs
1½ cups canola oil
1½ t vanilla
2 cups flour
1¼ t baking soda
¼ t salt
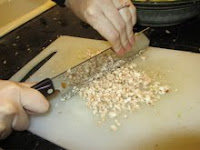
2 12oz canned beets, drained and pureed in food processor

Icing Ingredients:
2 cups heavy cream; cold
12 ounces cream cheese, at room temperature (Neufchatel is OK)
12 ounces mascarpone cheese
½ t vanilla
1½ cups powdered sugar, sifted
Chopped walnuts & grated chocolate (optional)
Cake:
1. Preheat oven to 350 F. Butter (or Crisco) three 9-inch cake pans. Line the pans with parchment paper. Butter and flour on top of the parchment paper.
2. Melt the chocolate in a heat proof bowl over steaming water. Set aside to cool.
3. Place sugar, eggs, oil and vanilla in the bowl of an electric mixer. Using a paddle attachment, mix on low speed for about two minutes.
4. In a separate bowl sift together flour, baking soda and salt.
5. Mixing on low speed, add flour mixture to egg mixture. Blend until just incorporated.
6. Remove bowl from mixer stand. Fold in cooled chocolate, pureed beets.
7. Divide batter evenly between the 3 prepared cake pans and bake for 20-25 minutes. The cake is done when it springs back when touched, or a toothpick comes out clean.
8. Transfer to a rack to cool for 10 minutes in the pans. Run a knife around the inside of the cooled cake’s rim. Turn the cakes out onto the racks to cool completely before frosting.
Icing:
1. Pour cream in the bowl of an electric mixer and whip to soft peaks. Transfer to a bowl and refrigerate or keep over ice until ready to use.
2. Using the same mixing bowl (no need to wash it) and the paddle attachment; place cream cheese and mix on medium speed until soft and smooth. Add mascarpone and mix until combined. Reduce the speed; add vanilla and powdered sugar, and mix well.
3. With a rubber spatula carefully fold in chilled cream. Chill until cake is ready to assemble. You may choose to ice the cake with a crumb coat first.
4. Hold the iced cake, tilting it sideways so you cake sprinkle the sides with the chopped walnuts. I decorate the top of the cake with icing rosettes & grated chocolate.
5. Keep cake refrigerated until ready to serve.

Friday, November 12, 2010

Yummmmy Easy Pasta Salad

For an easy delicious pasta salad, try this recipe from Linda Cathey. She brought it to a Children's Holiday Party meeting and it was a hit.

"Any kind of pasta you choose. Shrimp ( I get the cooked, frozen shrimp from Costco) I sometimes put crab in also. Chopped celery, chopped red onion.
The dressing is mayo (I use Miracle Whip), ketchup, Old Bay Seasoning. ( I use a LOT of Old Bay because I like it spicy) Use half as much ketchup as you do mayo. Make it the night before and put in fridge. You may have to add more dressing the next day as the pasta really absorbs it."

Wednesday, November 10, 2010

Veggies the Way Mom Would Make

Big Sweet 'n Spicy Veggie Pot

Just like Mom would make, this dish is so healthy you can feel it nourish your body. It is easy to make and very tasty too. For other recipes with vegetables try Tastes & Treasures Herb-Roasted Vegetables, pg 24 and Melange of Sauteed Vegetables, page 36.

Ingredients

2 cups cubed butternut squash (about half a squash) 

1 large eggplant, stem removed, peeled, and cubed 

1/2 head of cabbage, cored and cut in chunks 

1 zucchini, sliced into 1/4-inch coins 

1 large onion, chopped 

1 cup chopped carrots

One 15-oz. can pure pumpkin 

One 6-oz. can tomato paste 

1 1/2 tbsp. brown sugar (not packed) 

1 tsp. chopped garlic 

1/2 tsp. cinnamon 

1/2 tsp. salt, or more to taste 

1/4 tsp. cayenne pepper, or more to taste

1/4 tsp. ground ginger, or more to taste 

1/4 tsp. ground cumin, or more to taste 

1/4 tsp. chili powder, or more to taste

Directions
Place all cut veggies in an extra-large bowl and set aside.
In a medium bowl, combine all other ingredients and thoroughly mix. Spoon this mixture over the veggies and stir to coat.
Transfer mixture to a crock pot with a capacity of four quarts or more. If needed, pack it in tightly. (It will cook down.)
Cover and cook on high for 3 - 4 hours or on low for 7 - 8 hours, until veggies are very tender.
Stir well and serve.

MAKES 10 SERVINGS

PER SERVING (1 cup): 85 calories, 0.5g fat, 163mg sodium, 20g carbs, 5.75g fiber, 9g sugars, 3g protein -- POINTS® value 1*

Monday, November 8, 2010

Pecan Squares

Great cooks sharing great recipes. That is what Tastes & Treasures cookbook is all about. Thanks to Carolyn for this wonderful treat found on page 172.

PECAN SQUARES

Brown Sugar Crust
Ingredients:
1 cup butter, at room temperature
3.4 cup brown sugar
½ t salt
3 cups flour
Pecan Filling
½ cup butter
½ cup brown sugar, lightly packed
6 T honey
2 T sugar
2 T heavy cream
¼ t salt
2 cups pecan halves
½ t vanilla

For the Crust:
1. In the bowl of an electric mixer with the paddle attachment, beat the butter and sugar on medium speed until light and fluffy, about 2 minutes.
2. Add the salt to the flour and stir with a fork. With the mixer speed on low, add the flour to the butter mixture one cup at a time, allowing the flour to mix in before adding more flour. Mix until just incorporated.
3. Press the dough about ¼ inch thick into the bottom of a 9x13 baking pan and prick with a fork. Chill for 20 minutes.
4. Preheat oven to 375 F. Bake for about 20 minutes, or until light golden brown.
5. Remove the crust from the oven and cool on a wire rack.
6. Reduce the oven temperature to 325 F.

For the Filling:
1. Combine the butter, brown sugar, honey, sugar, cream and salt in a medium sized sauce pan.
2. Bring to a boil over high heat and boil for 1 minute, stirring constantly. The mixture should coat the back of a spoon.
3. Remove from the heat and stir in the pecans and vanilla.
4. Pour the filling into the cooled crust and return to the oven. Bake for 15-20 minutes or until bubbly.
5. Remove from the oven and cool on the wire rack.
6. When cool, run a sharp knife along the edges of the pan and invert onto the wire rack. Invert the pecan squares onto a cutting board and cut into squares.
7. Store in an airtight container up to a week.

Makes about 32 squares

Saturday, November 6, 2010

Pumpkin Double-Ginger Cookies


Healthy and tasty pumpkin cookies. . . Thanks to canned pumpkin and Greek-style non-fat yogurt to keep these moist and delicious, and cake flour to make them tender. Try these tricks with all your holiday cookies.

Pumpkin Double-Ginger Cookies

¾ cup canned pumpkin puree
¾ cup packed light-brown sugar
½ cup non-fat plain Greek-style yogurt
2 tablespoons canola oil
1 teaspoon vanilla
½ cup finely chopped crystallized ginger
2 cups sifted cake flour
1 teaspoon cinnamon
¾ teaspoon ground ginger
½ teaspoon baking soda
½ teaspoon salt
¼ teaspoon ground nutmeg

Position a rack in the center of the oven and heat to 350 degrees. Coat two baking sheets with cooking spray or line with parchment.

In a large bowl, combine the pumpkin, brown sugar, yogurt, oil and vanilla. Whisk until smooth. Stir in the crystallized ginger.

In a medium bowl, stir together the flour, cinnamon, ground ginger, baking soda, salt and nutmeg. Stir the dry ingredients into the wet, mixing until just blended.

Drop tablespoons of the batter onto the prepared baking sheets, spacing cookies about 1 ½ inches apart. Bake in 2 bathes if necessary, until lightly browned, about 15 minutes. Transfer cookies to a wire rack and let cool.

Makes 40 cookies.
Nutrition information per cookie (without frosting): 54 calories, 1 g fat, 0 cholesterol, 11 g carbohydrates, 1 g protein, 1 g fiber, 38 mg sodium, 13 percent of calories from fat.

Thursday, November 4, 2010

Cranberry Lemon Bars for the Holidays


If you are looking for that yummy treat for the Holidays and want to make something ahead of time, this is the answer. Enjoy this delightful bar from League member, Sally Schaefer. We got the recipe after she made it for the Historical League Membership Open House in October. Donna Esposito, Dianne Linthicum and Mariamne Moore help present the bounty for League members and guests.

CRANBERRY LEMON BARS

1st Layer:
1/2 C sugar
3/4 C butter
]1 1/2 C flour
Blend with pastry blender and press into greased & floured 9x13" pan. Bake 12 min. at 325 degrees.
2nd Layer:
2 eggs beaten
1/4 tsp salt
1/4 tsp baking powder
1 C packed brown sugar
1 C chopped walnuts or pecans (I used Pecans)
3-4 tablespoons jellied cranberry sauce
Mix and pour over crust. Bake 20 min. at 325 degrees.

3rd Layer:
Juice of 1 Lemon and grating from peel
Mix juice and peel with
1 1/2 C powdered sugar
1 tablespoons butter softened until spreadable
Pour and spread over Hot bars.

Cool and cut into small squares or diamonds.
(Hint: Dip knife into hot water as you cut them to make cutting easier.)

Can be made ahead of time & refrigerate.